Article content
Here is a quick guide on how to install Lightroom Presets on desktop computers. Whether you use Lightroom on Mac or Windows.
Lightroom classic CC (2018 and newer)
STEP 1
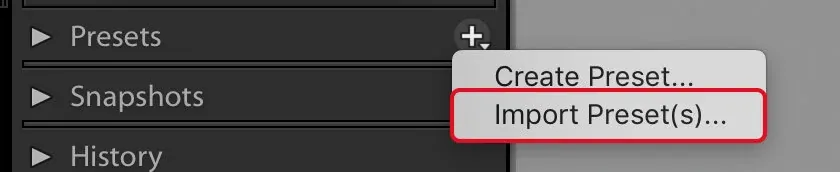
Go to Develop Module (Shortcut D) and click the plus sign on the right side of the Presets panel.
STEP 2
Select your presets individually or install a zip file that is easier and faster and then click Import.
Lightroom CC
STEP 1
Inside Lightroom CC, go to File > Import Profiles & Presets.
STEP 2
Select the presets. Either import a zip file or select the presets and use shortcut CTRL/CMD+A to select all presets you want to add directly to Lightroom CC.
Download 8 New EPIC Presets for Free.
How to install Lightroom 4, 5, 6 & CC 2017 presets for windows
Open Lightroom
Go to: Edit • Preferences • Presets
Click on the box titled: Show Lightroom Presets Folder
Double click on Lightroom
Double click on Develop Presets
Copy the folder(s) of your presets into the Develop Presets folder
Restart Lightroom
How to install Lightroom 4, 5, 6 & CC 2017 presets for mac
Open Lightroom
Go to: Lightroom (Dialogue) • Preferences • Presets
Click on the box titled: Show Lightroom Presets Folder
Double click on Lightroom
Double click on Develop Presets
Copy the folder(s) of your presets into Develop Presets folder
Restart Lightroom
Learn more about my fine art landscape presets
The editing system behind the look
EPIC Preset System
The look in this article is built in Lightroom. EPIC is the full editing system for those decisions — light, colour, tone and atmosphere — as a repeatable workflow.
- The EPIC presets and colour profiles
- A ten-step, base-to-final Lightroom workflow
- A video walkthrough (every preset and mask stays adjustable)