The Last Leaves: Editing a Misty Lake Photograph in Lightroom
Contents
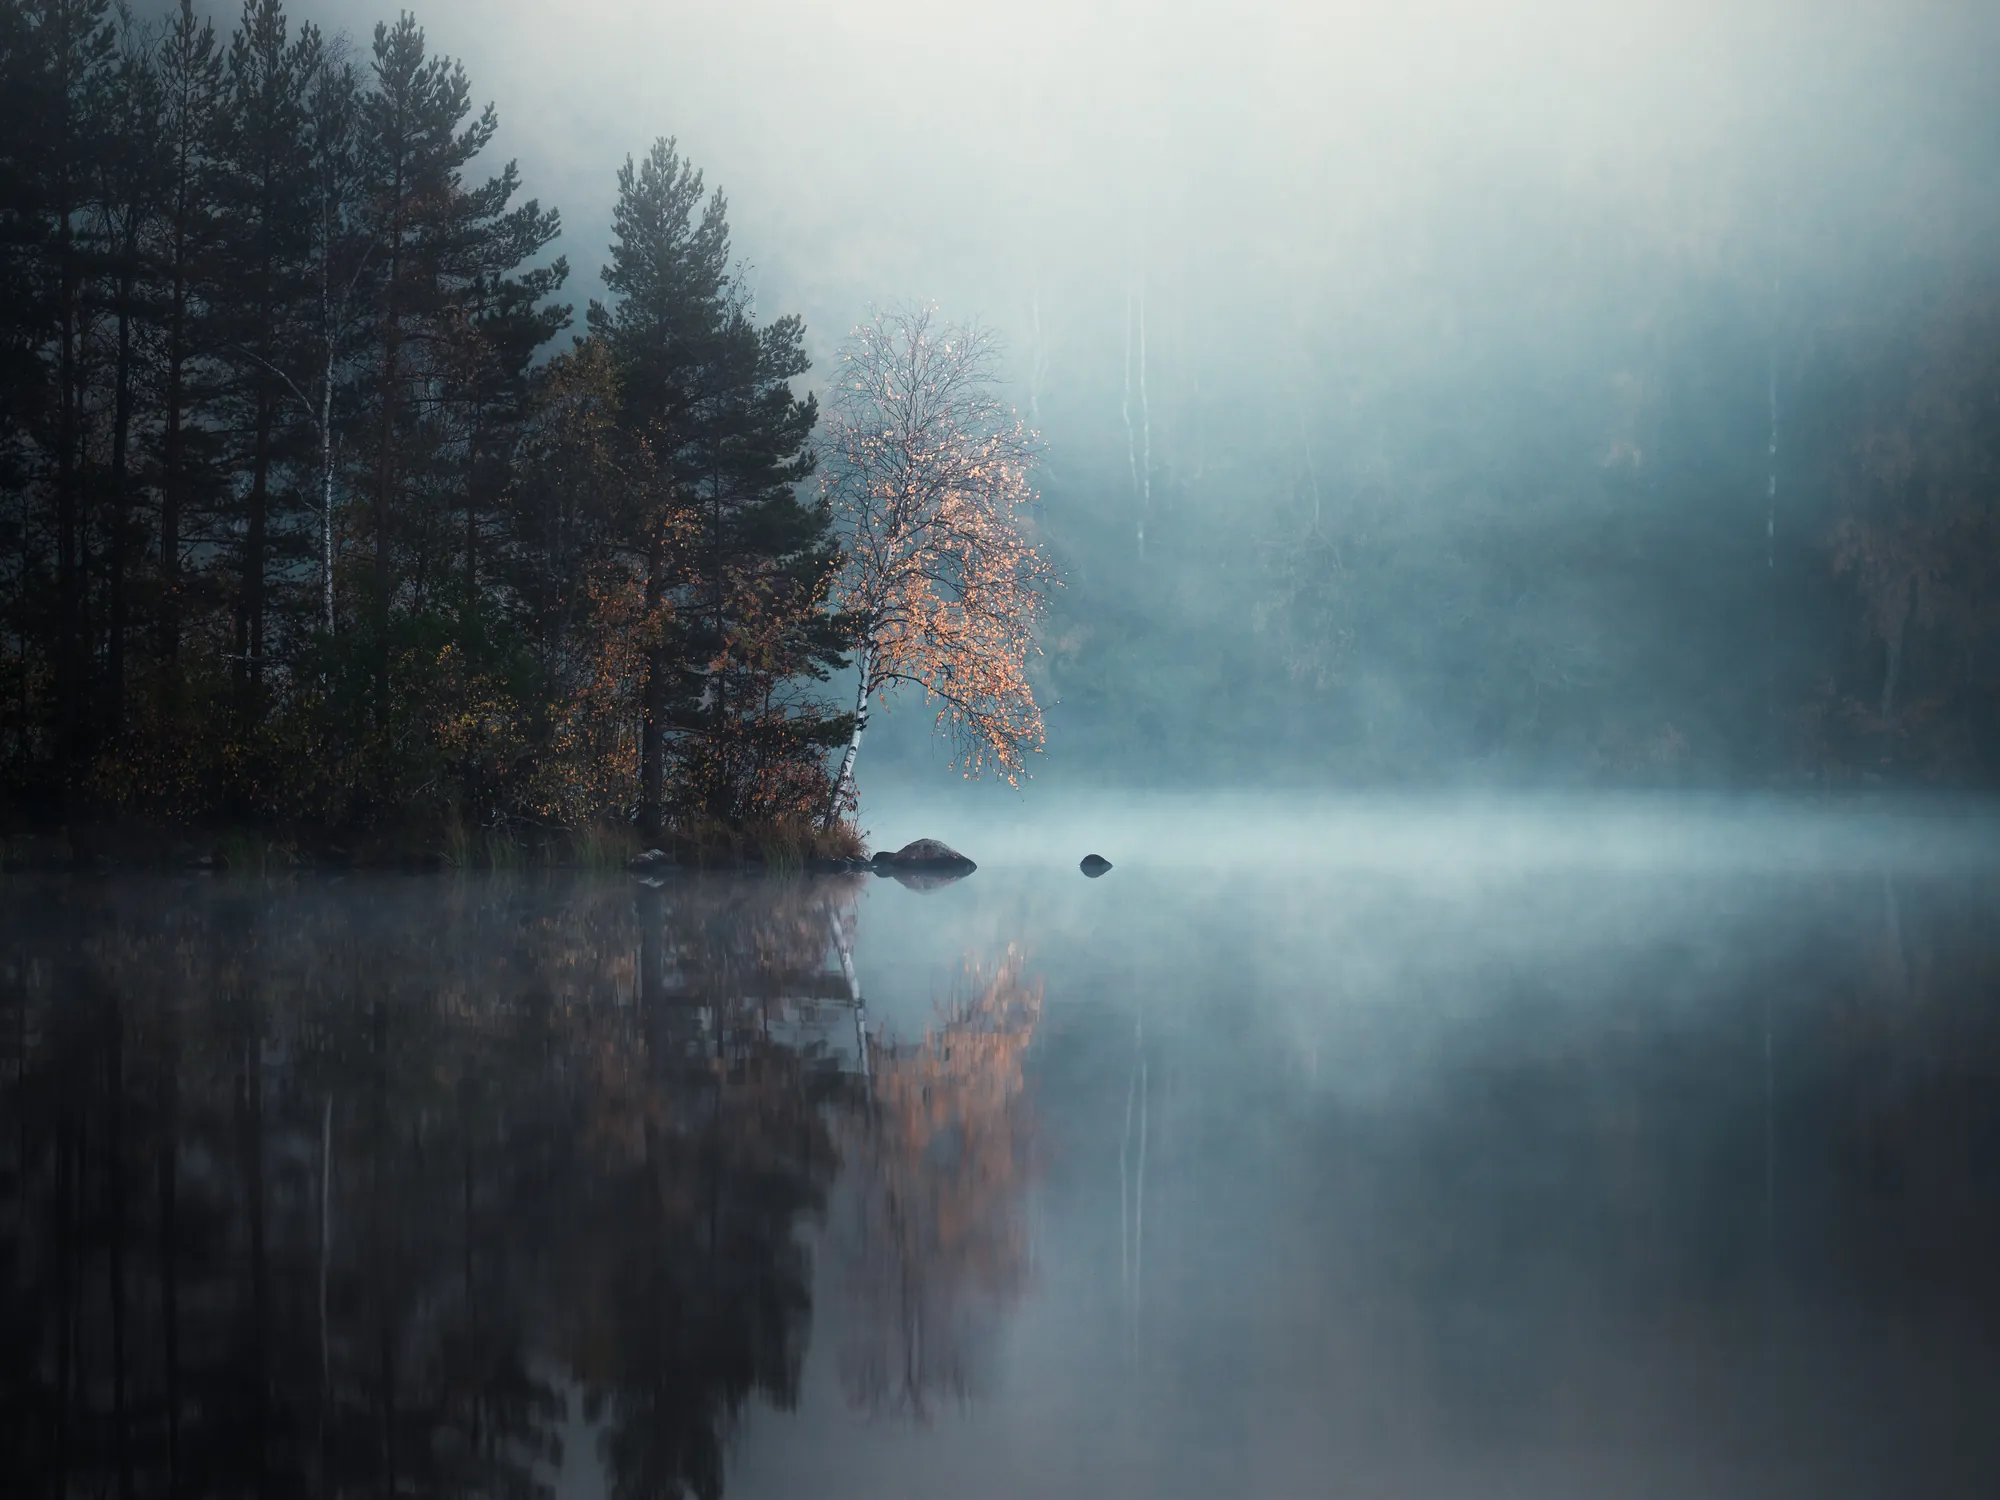
When I’m out photographing, I often look for one small detail that stands out from the rest of the landscape. On this autumn morning in Mäntsälä, it was a small birch at the very end of a pine-covered point. The lake was covered in mist and almost everything around me was grey and blue, but the birch was still holding on to a few orange leaves, and the still water reflected them back. It was such a small detail, but once I noticed it, I couldn’t look anywhere else.
I didn’t want the whole lake in the photograph. I used my 70–200mm lens at 165mm and kept only the end of the point, the birch and its reflection in the frame. The dark pines and the mist were enough to give the birch its place, and the far shore faded into the fog behind them.
When I opened the RAW file later, that feeling was hard to find. Everything was the same flat grey. In this article I go through how I edited the photograph in Lightroom, step by step: the settings I used, and what I was trying to bring back at each stage.
Camera settings
- Camera: Nikon Z8
- Lens: NIKKOR Z 70-200mm f/2.8 VR S
- Focal Length: 165mm
- Aperture: f/2.8
- ISO: 400
- Shutter Speed: 1/160 sec
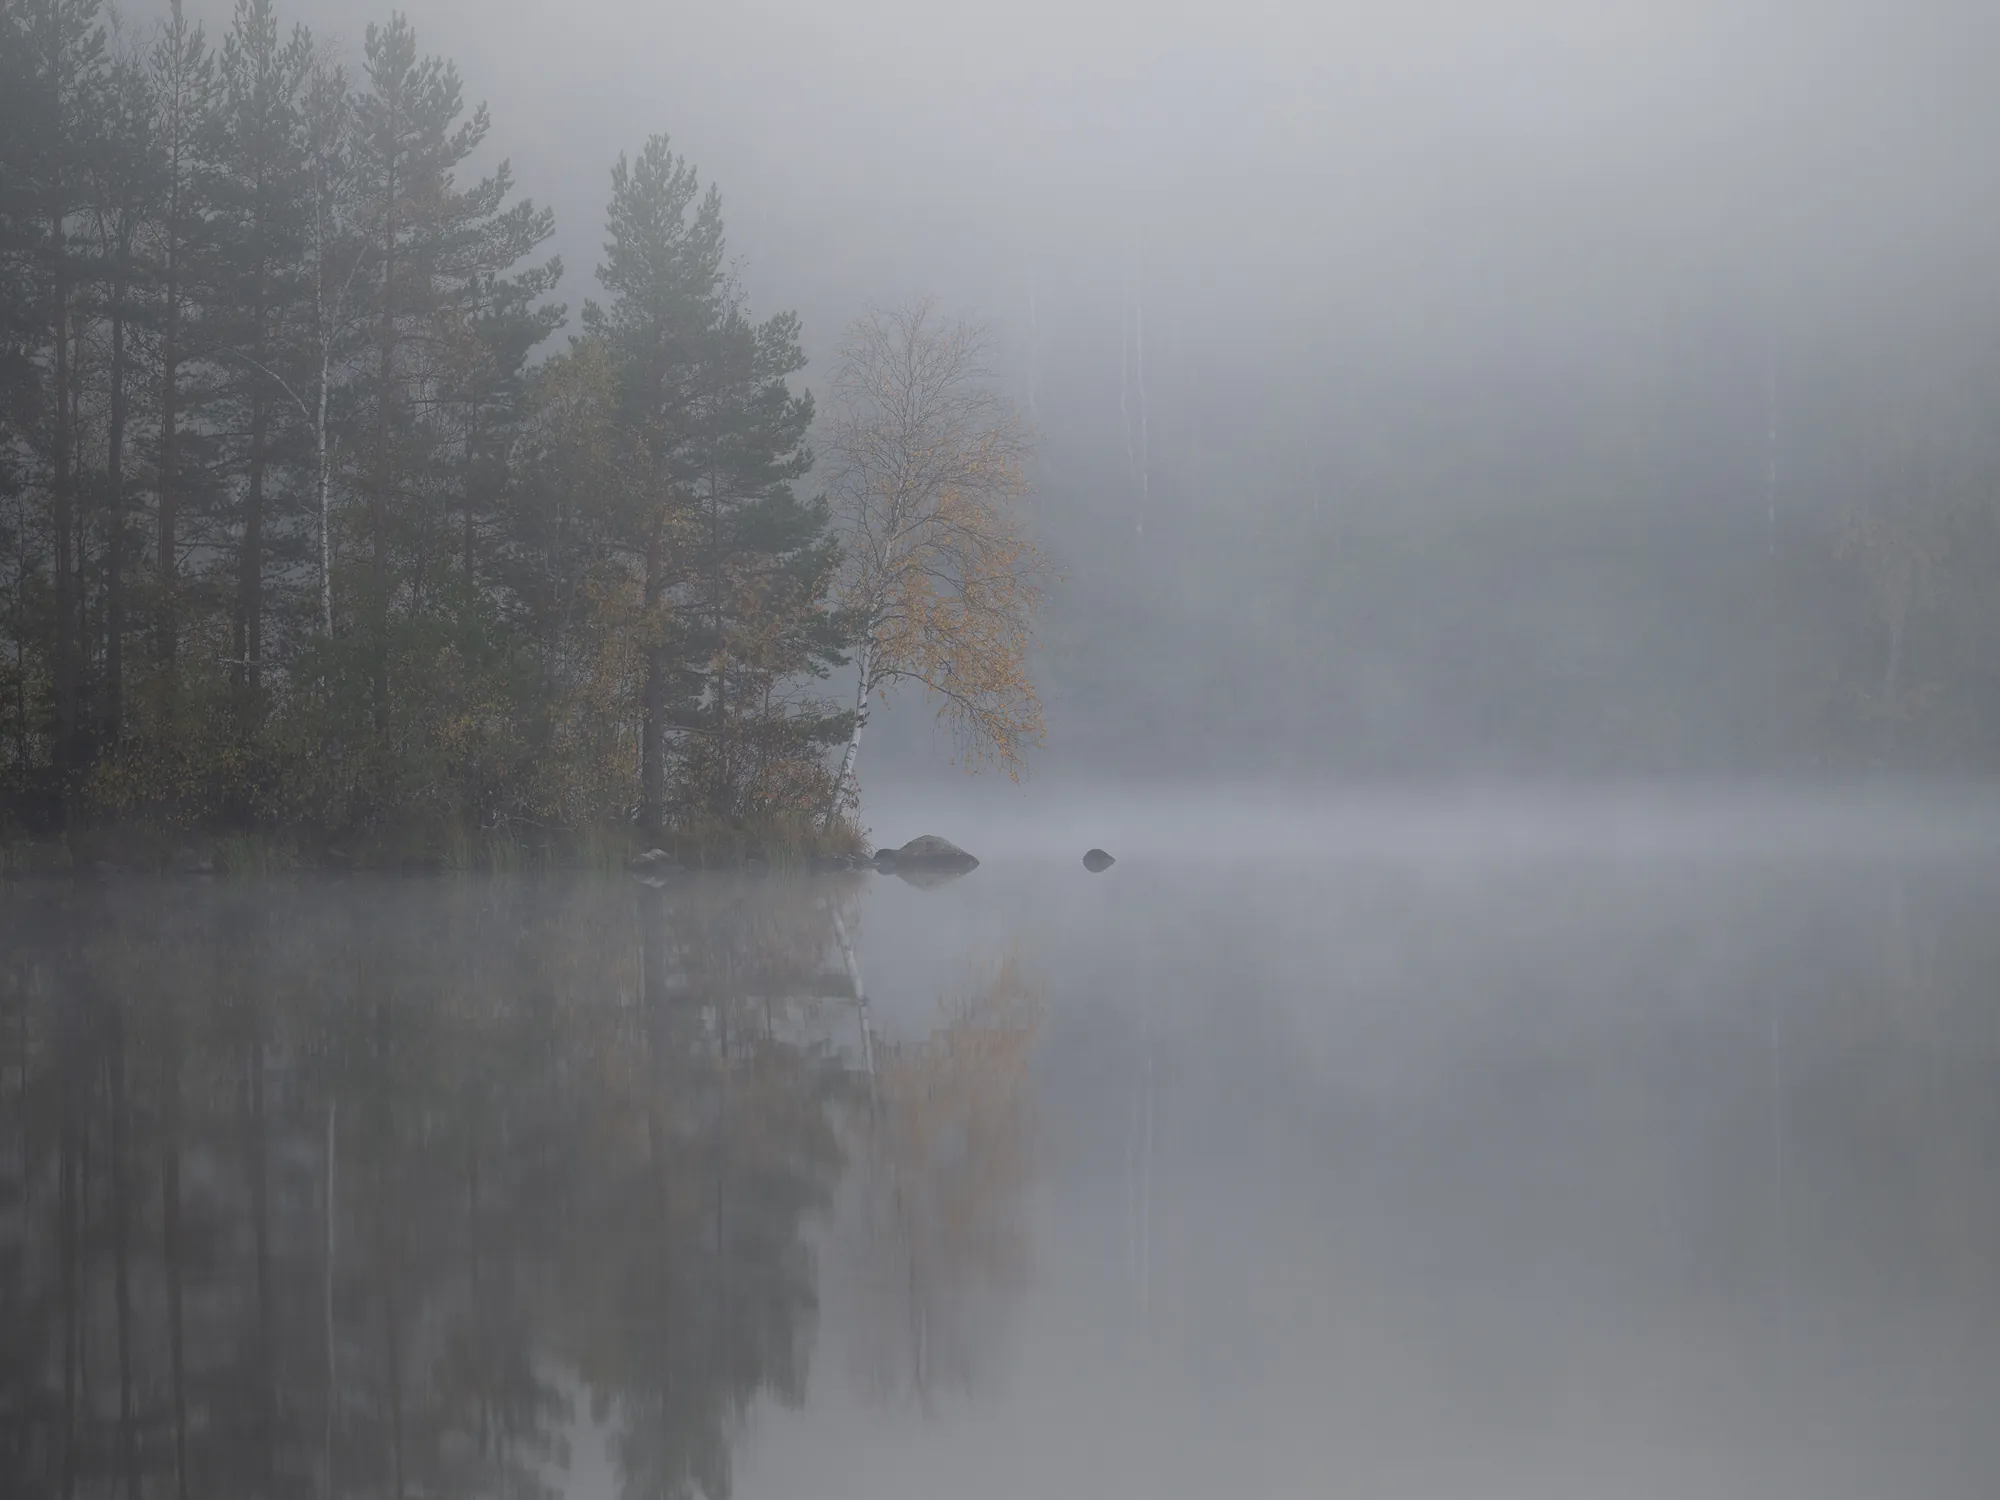
Before editing: the RAW file
When I opened the file, almost everything in it was the same grey. The pines were a muddy green, the mist was neutral and flat, and the birch, which was the reason I took the photograph, hardly separated from the trees behind it. Its leaves looked more yellow-brown than orange.
The composition and the reflection were what I wanted, so the work was in the tones and colours. I wanted the pines darker, the mist lighter and a little cooler, and the birch to be the brightest and warmest part of the image.
Step 1: Starting with an EPIC preset
I began with a preset from my EPIC collection: EPIC III – Medium – Big, from the #EPIC 1 – Update – Cinematic group.
The preset made the whole image darker and cooler. The grey fog turned blue, the pines went almost black and the birch leaves became a muted, rusty orange. That was further than I wanted to go, but I liked having the dark tones and the cool colour as a base. My plan from there was to bring the light back with the global adjustments, so that the mist would be bright again and the birch would stand out from the pines.
Step 2: Global Lightroom adjustments
I’ve listed the values as they were in the finished edit, so they include both the preset and my own changes.
1. White balance and profile. Adobe Color, with a custom white balance.
- Temp
- 7010
- Tint
- +12
2. Tone.
- Exposure
- −1.35
- Contrast
- +44
- Highlights
- +62
- Shadows
- +85
- Whites
- +70
- Blacks
- −29
I lowered the exposure a lot and then pushed most of the other sliders up. With the exposure down, the brightest part of the fog kept its tone instead of turning white. I then used Highlights and Whites to make the mist brighter again, so it would look lighter than the grey in the RAW. Shadows at +85 brought back the trunks and branches of the pines, which the preset had made almost black. Blacks at −29 kept the darkest parts of the trees and the reflection properly dark, so the lifted shadows didn’t make the image look washed out.
3. Presence.
- Texture
- 0
- Clarity
- +21
- Dehaze
- 0
- Vibrance
- +23
- Saturation
- +25
I used Clarity to add a little midtone contrast to the birch branches and the edge of the point. I left Texture and Dehaze at zero. I wanted to keep the fog as it was in the frame and change only its brightness and colour, and Dehaze would have taken some of it away.
4. Color Mixer. This is where I did most of the work to separate the birch from the mist.
- Hue Red
- +18
- Hue Orange
- −19
- Hue Yellow
- −32
- Hue Blue
- −36
The leaves had a mix of reds, oranges and yellows in them. I moved Red towards orange and pulled Orange and Yellow towards red, so the leaves came together as one orange. Moving Blue towards aqua gave the mist its teal colour.
I lowered Saturation for every colour by roughly the same amount, between −22 and −28. Together with the Vibrance and Saturation values in the Basic panel, this kept the colours muted and even across the image, so the orange didn’t become too strong next to the soft mist.
- Luminance Red
- +56
- Luminance Orange
- +100
- Luminance Yellow
- +97
- Luminance Green
- −11
- Luminance Aqua
- +11
- Luminance Blue
- −42
- Luminance Purple
- −17
The luminance values made the biggest difference in the whole edit. With Orange and Yellow almost at maximum, the leaves became much brighter without getting more saturated. I lowered Green and Blue to darken the pines and the blue in the water, and raised Aqua a little to keep the teal mist light. After this, the birch stood out mainly because it was brighter than its surroundings, and its colour still looks natural.
5. Color Grading. I moved the shadows towards blue and the highlights towards a soft yellow-green, and left the midtones untouched.
- Blending
- 100
- Balance
- −75
With Blending at 100, the two colours blend smoothly into each other. Balance at −75 gives the shadow colour most of the tonal range, so the blue reaches up into the mist and the water. The warmer, slightly green tint stays only in the brightest part of the fog, and I wanted it there so the mist wouldn’t be entirely blue.
6. Effects. A very small Post-Crop Vignette, with the Highlight Priority style.
- Amount
- −7
- Feather
- 100
- Highlights
- 51
I chose Highlight Priority so that the bright fog near the edges would stay clean instead of turning grey. The vignette only darkens the corners slightly.
After the global adjustments, the colours were close to what I wanted. The mist was light and teal, the birch was orange and the pines had detail. But the image was now fairly bright all over, and the birch didn’t yet stand out as clearly as I wanted.
Step 3: Local adjustments with masks
For the last adjustments I used two local masks. I painted Mask 1 with a large, soft brush across the middle band of the photograph: the point, the birch, the far shore in the mist and the upper part of the reflection.
- Exposure
- +0.09
- Highlights
- +13
- Shadows
- +6
- Whites
- +15
- Blacks
- +4
The brush was set to Size 6, Feather 100, Flow 54 and Density 100. I kept the values small because I only wanted the middle band to be a little lighter than the top and bottom of the frame, not to brighten the whole scene. With the soft brush, there are no visible edges in the mist where the mask ends.
Mask 2 is a second brush with only one change:
- Exposure
- +0.20
I painted it over the birch, the trees on the left and the band of mist over the water. These are the places I wanted the eye to go first, so they got a little more light than the rest of the middle band.
The final crop
Last, I cropped the photograph to 4:3 to remove some of the surrounding space and keep the point, the birch and its reflection at the centre of the composition.
In the final image, the pines on the left and the bottom of the reflection are darker again, and the mist is still soft and light. What I’m happiest with is the birch: it is now the brightest and warmest thing in the frame, and its orange carries down into the reflection in the water.
The print
The Last Leaves is my Monthly Print for November. It can be ordered as a fine art print until 30 November 2026, and in December a different photograph will take its place.
Continue reading

The Myth of the Perfect Shot. An Iceland Case Study
Even in Iceland, RAW files can look flat and boring. See how a lucky moment at Vík was transformed into a dramatic fine art print using color grading.

How To Process Fog & Mist Pictures in Lightroom
A 2014 Lightroom 5 walkthrough of how I process a foggy summer sunrise photograph from Porvoo, Finland, step by step from lens correction onward.

Mastering the Mood – How to Photograph Fog and Mist
How I photograph fog and mist: work with soft light, expose pale scenes carefully and use layers to give quiet landscapes depth.

Cinematic Color Grading in Lightroom: Creating Atmosphere
How I use Lightroom's Color Grading tools, cool shadows and a touch of warm light to shape atmosphere in landscape photographs, with real examples.